Customize
Place Custom Button to Right of Field
Summary
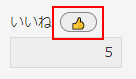
Place a small custom button to the right of the label of the specified field.
By combining with the condition of “when the button is clicked,” you can customize the action.
How to use
Simply placing the button on the screen will not make it functional; pressing it will have no effect. To make something happen when the button is clicked, you need to add a specific action and set the condition to “when the button is clicked” for that action.
You can place multiple buttons in one field. In this case, buttons are added from left to right in the order the actions were performed.
Placing the button does not widen the field display. When the button label is too long or more than two buttons are present, the adjacent field may obscure them.
Parameters
Set Field and Label.
Field
Select the field where the button will be placed.
Note that this parameter does not accept the following field types:
- Status
- Assignee
- Blank space
This parameter does not accept fields that are inside tables.
Label
Specify the label to display on the button on screen.
Information for advanced users
The button that will be placed will be assigned the following CSS class names:
- customine-button
- customine-at-field-label
Additionally, an ID will be assigned using the format:
- customine-button-action number (e.g., customine-button-1)
The ID will consist of “customine-button-action” followed by a numerical value.
With this ID, you can customize the button style by registering a CSS file in the application.
Restrictions
-
The mobile view is not supported. There is no error when executed on the mobile version, and nothing happens.
-
The record list screen is not supported. An error occurs when executed on the record list screen.
-
If the “Hide field name” option is turned on in the field settings, an error will occur at runtime. For table, if the “Hide table name” option is turned on in the table settings, it will result in an error.
-
If the field is not displayed for some reason, it will result in a runtime error. For example, the following cases may occur:
- Fields or groups are hidden due to the “Hide Fields and Groups” action.
- Access permission has not been granted.
-
Internet Explorer 11 is not supported.
Related Articles
- How to Add Keyword Search to Lookup Fields
- I want to create records for each type set in the master.
- Let's try assigning shortcut keys to the buttons you arranged.
- https://support.gusuku.io/ja-JP/support/solutions/articles/36000549908
- https://support.gusuku.io/ja-JP/support/solutions/articles/36000561169
- https://support.gusuku.io/ja-JP/support/solutions/articles/36000561182
- https://support.gusuku.io/ja-JP/support/solutions/articles/36000561184
- https://support.gusuku.io/ja-JP/support/solutions/articles/36000561711
- https://support.gusuku.io/ja-JP/support/solutions/articles/36000563736
- https://support.gusuku.io/ja-JP/support/solutions/articles/36000575350