Customize
Place Button in Header
Summary
Places the button at the specified location (menu position).
By combining with the condition of When the button is pressed, you can customize to perform some action when you press a button.
How to use
When you place a button, it only appears on the screen, and when you press it, nothing happens. To customize something to do when you press a button, place another action and add the When the button is pressed condition.
You can also place more than one button in a single location.In this case, buttons are added from left to right in the order in which the actions are performed.
Parameters to set
Set Location Label.
Location
Choose where to place the button.
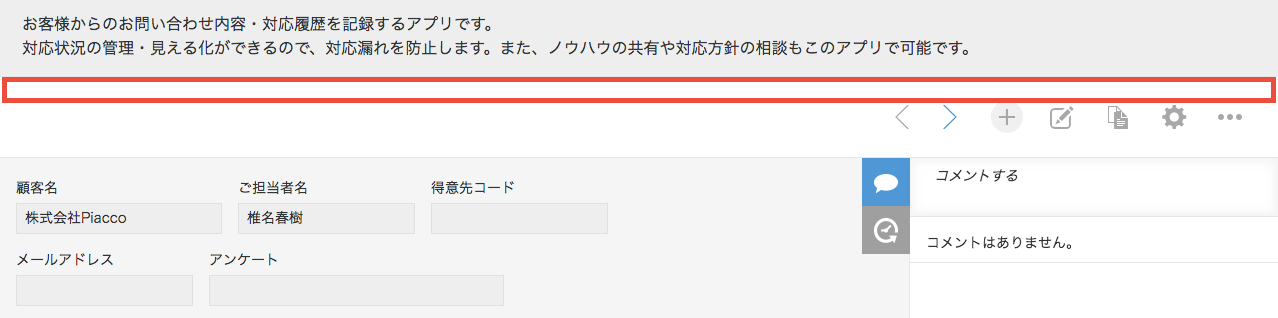
- Above Record Details menu… It is displayed in the position of the following figure on the record detail screen or the edit screen.
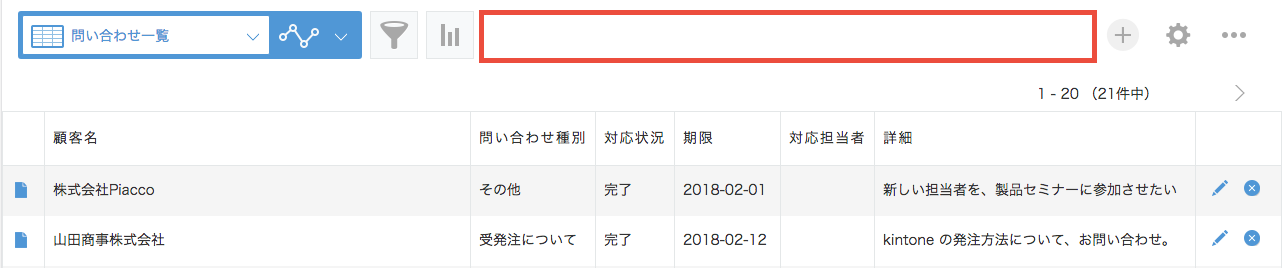
- To the right of the list menu… It is displayed in the position shown below in the record list screen.
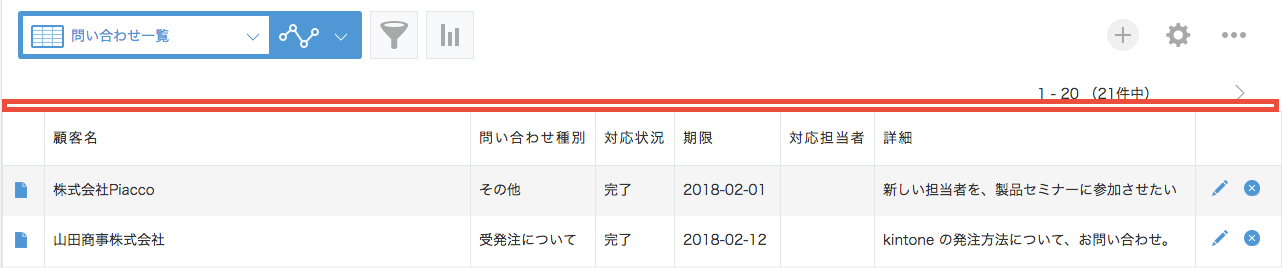
- Below the list screen menu… It is displayed in the position shown below in the record list screen.
Label
Specifies the label that appears on the button when it is displayed on the screen.
Advanced Information
The button will have the following CSS class name:
- customine-button
- At the top of the record details screen: customine-at-record-header-menu-space
- On the right side of the list screen: customine-at-header-menu-space
- In the lower part of the list screen menu: customine-at-header-space
You can also use ID.
- customine-button-action-## (for example, customine-button-1)
This allows you to customize the style of buttons by registering a CSS file in your app.
Limitations
“Top of the record details screen” cannot be used in the list screen.
“Right side of list screen menu” and “Bottom side of list screen menu” cannot be used outside of list screen.
“Right side of list screen menu” is not supported in the mobile version app.
Related Articles
- https://support.gusuku.io/ja-JP/support/solutions/articles/36000061349
- https://support.gusuku.io/ja-JP/support/solutions/articles/36000067930
- https://support.gusuku.io/ja-JP/support/solutions/articles/36000092079
- https://support.gusuku.io/ja-JP/support/solutions/articles/36000126504
- https://support.gusuku.io/ja-JP/support/solutions/articles/36000127954
- https://support.gusuku.io/ja-JP/support/solutions/articles/36000127956
- https://support.gusuku.io/ja-JP/support/solutions/articles/36000130644
- https://support.gusuku.io/ja-JP/support/solutions/articles/36000130971
- https://support.gusuku.io/ja-JP/support/solutions/articles/36000130976
- https://support.gusuku.io/ja-JP/support/solutions/articles/36000130980
- https://support.gusuku.io/ja-JP/support/solutions/articles/36000134391
- https://support.gusuku.io/ja-JP/support/solutions/articles/36000139032
- https://support.gusuku.io/ja-JP/support/solutions/articles/36000154212
- https://support.gusuku.io/ja-JP/support/solutions/articles/36000162171
- https://support.gusuku.io/ja-JP/support/solutions/articles/36000165237
- https://support.gusuku.io/ja-JP/support/solutions/articles/36000169918
- https://support.gusuku.io/ja-JP/support/solutions/articles/36000175077
- https://support.gusuku.io/ja-JP/support/solutions/articles/36000184474
- https://support.gusuku.io/ja-JP/support/solutions/articles/36000198045
- https://support.gusuku.io/ja-JP/support/solutions/articles/36000220755
- https://support.gusuku.io/ja-JP/support/solutions/articles/36000222282
- https://support.gusuku.io/ja-JP/support/solutions/articles/36000224324
- https://support.gusuku.io/ja-JP/support/solutions/articles/36000227897
- https://support.gusuku.io/ja-JP/support/solutions/articles/36000268286
- https://support.gusuku.io/ja-JP/support/solutions/articles/36000268287
- https://support.gusuku.io/ja-JP/support/solutions/articles/36000275840
- https://support.gusuku.io/ja-JP/support/solutions/articles/36000303634
- https://support.gusuku.io/ja-JP/support/solutions/articles/36000308023
- https://support.gusuku.io/ja-JP/support/solutions/articles/36000309337
- https://support.gusuku.io/ja-JP/support/solutions/articles/36000309530
- https://support.gusuku.io/ja-JP/support/solutions/articles/36000309763
- https://support.gusuku.io/ja-JP/support/solutions/articles/36000309764
- https://support.gusuku.io/ja-JP/support/solutions/articles/36000329851
- https://support.gusuku.io/ja-JP/support/solutions/articles/36000359449
- https://support.gusuku.io/ja-JP/support/solutions/articles/36000384491
- https://support.gusuku.io/ja-JP/support/solutions/articles/36000413918
- https://support.gusuku.io/ja-JP/support/solutions/articles/36000449482
- https://support.gusuku.io/ja-JP/support/solutions/articles/36000459016
- https://support.gusuku.io/ja-JP/support/solutions/articles/36000464739
- https://support.gusuku.io/ja-JP/support/solutions/articles/36000466069
- https://support.gusuku.io/ja-JP/support/solutions/articles/36000466303
- https://support.gusuku.io/ja-JP/support/solutions/articles/36000474773
- https://support.gusuku.io/ja-JP/support/solutions/articles/36000477246
- https://support.gusuku.io/ja-JP/support/solutions/articles/36000480099
- https://support.gusuku.io/ja-JP/support/solutions/articles/36000483487
- https://support.gusuku.io/ja-JP/support/solutions/articles/36000502243
- https://support.gusuku.io/ja-JP/support/solutions/articles/36000503481
- https://support.gusuku.io/ja-JP/support/solutions/articles/36000538537
- https://support.gusuku.io/ja-JP/support/solutions/articles/36000561164
- https://support.gusuku.io/ja-JP/support/solutions/articles/36000563736
- https://support.gusuku.io/ja-JP/support/solutions/articles/36000570000
- https://support.gusuku.io/ja-JP/support/solutions/articles/36000575350
- https://support.gusuku.io/ja-JP/support/solutions/articles/36000576549
- https://support.gusuku.io/ja-JP/support/solutions/articles/36000588956
- https://support.gusuku.io/ja-JP/support/solutions/articles/36000588958
- https://support.gusuku.io/ja-JP/support/solutions/articles/36000588961
- https://support.gusuku.io/ja-JP/support/solutions/articles/36000588962
- https://support.gusuku.io/ja-JP/support/solutions/articles/36000588963
- https://support.gusuku.io/ja-JP/support/solutions/articles/36000588964
- https://support.gusuku.io/ja-JP/support/solutions/articles/36000589399
- https://support.gusuku.io/ja-JP/support/solutions/articles/36000603145